
December 2015:
At the risk of sounding like a pansy, I decided I didn’t want to keep doing flatwater workouts all winter long. It gets cold in northern Minnesota. That and the rivers and lakes tend to freeze over, but minor details.
So I thought about taking a perfectly good coat rack, er, NordicTrack that I picked up from Craigslist for $20 and converting it to a kayak ergometer. I mean, if someone on YouTube could do it, so could I right? Besides, I can cross-country ski just about out my front door, and falling on XC skis into snow is a lot less painful than falling off the NordicTrack into the basement shelving. Usually.
And here it is- story of about 2 days of building/ troubleshooting/ making a mess in the basement:
It all starts with the NordicTrack.
The previous owner of this fine machine suffered from what apparently is a common NordicTrack ailment- Basement dust. Guess he hadn’t used it in a few years and was wanting to unload it onto an unsuspecting noob to the Northland (me). Haha, sucker! Now it’s collecting dust in MY basement!
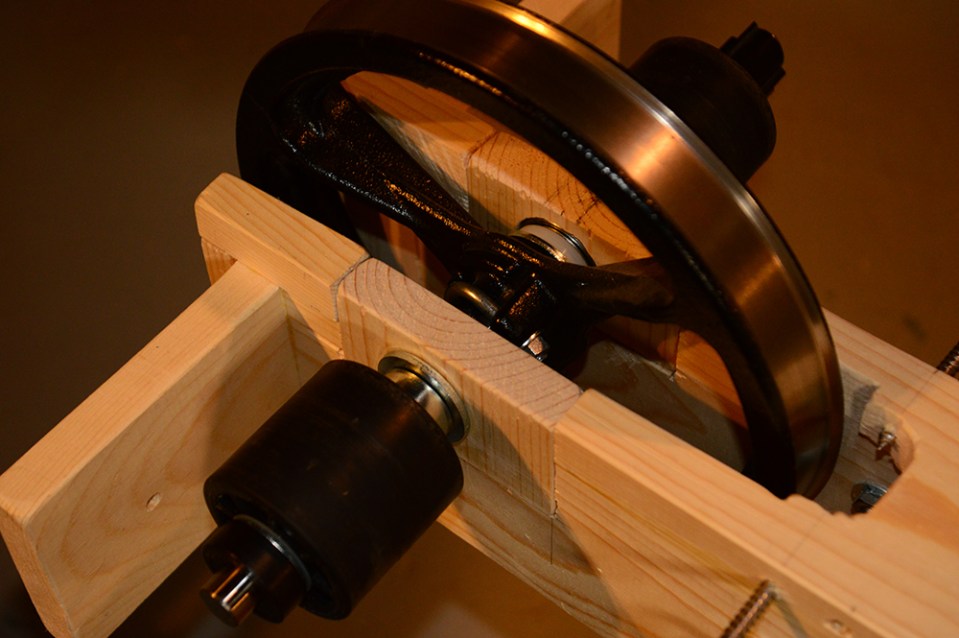
But here is the important bit/ heart/ soul of the NordicTrack- the flywheel:
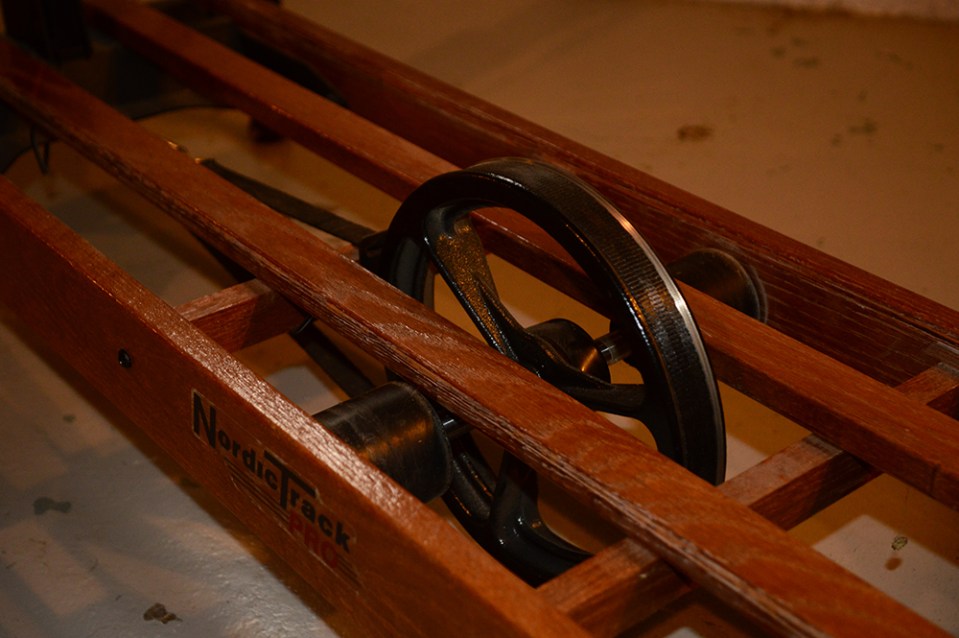
The bearings on either side rotate freely in one direction, and lock onto the flywheel axle the other way spinning the wheel. Normally the NordicTrack skis drive the bearings, but this can be used in the kayak erg for resistance.
Turns out you can take apart the NordicTrack pretty easily. Good thing too in case the kayak erg turns out to be a total fail…
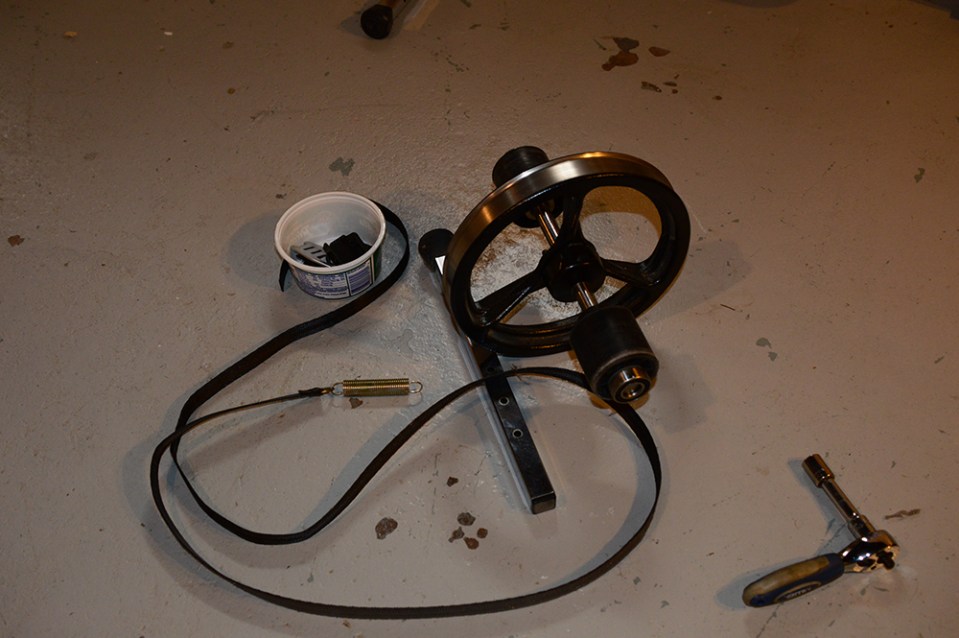
First thing I did was to remove the flywheel assembly and tensioner band. No, that’s not true. First thing I did was go to Home Depot and buy a bunch of dimensional lumber and hardware. THEN I took apart the NordicTrack. At first I didn’t want to dis-assemble the flywheel and parts so I designed the kayak erg v1 around keeping this whole bit intact.

After building the flywheel “box”- the middle portion of the kayak erg.
Added in an adjustable footplate and 1″ webbing for a strap.
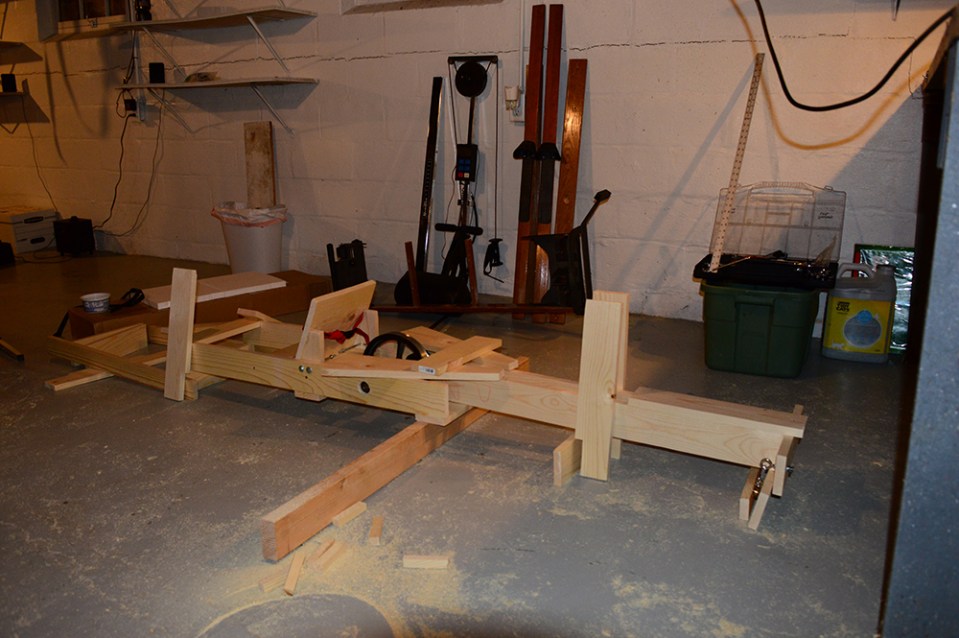
Next I cut all the additional pieces of lumber to make the front pulley bar and vertical supports.
Upside-down with the stands and front pulley bar attached.
…and upright. Looks like a wooden At-At.
After most the pieces were somewhat haphazardly thrown together, I had something that was beginning to look like what I planned…
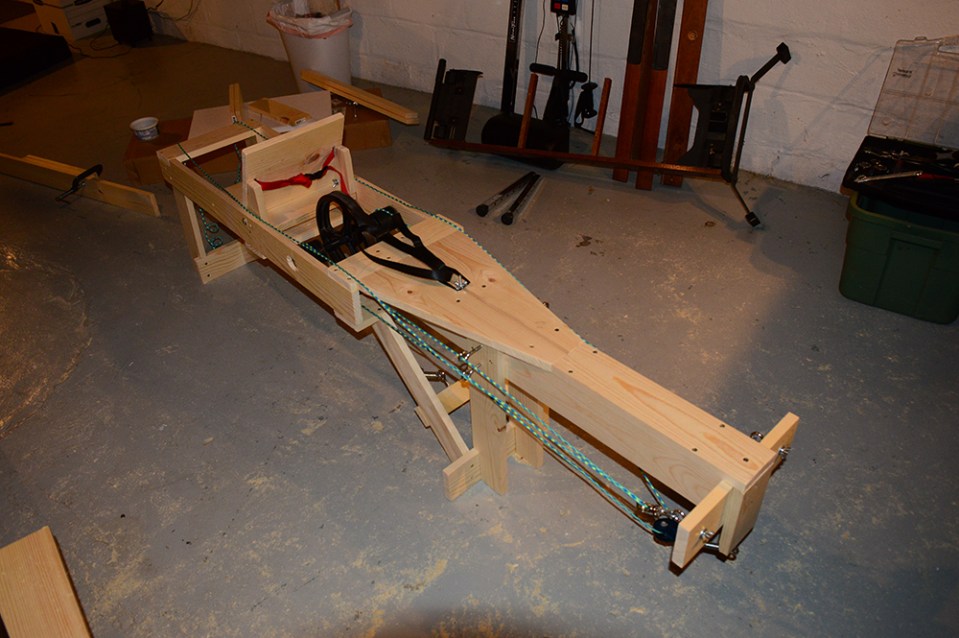
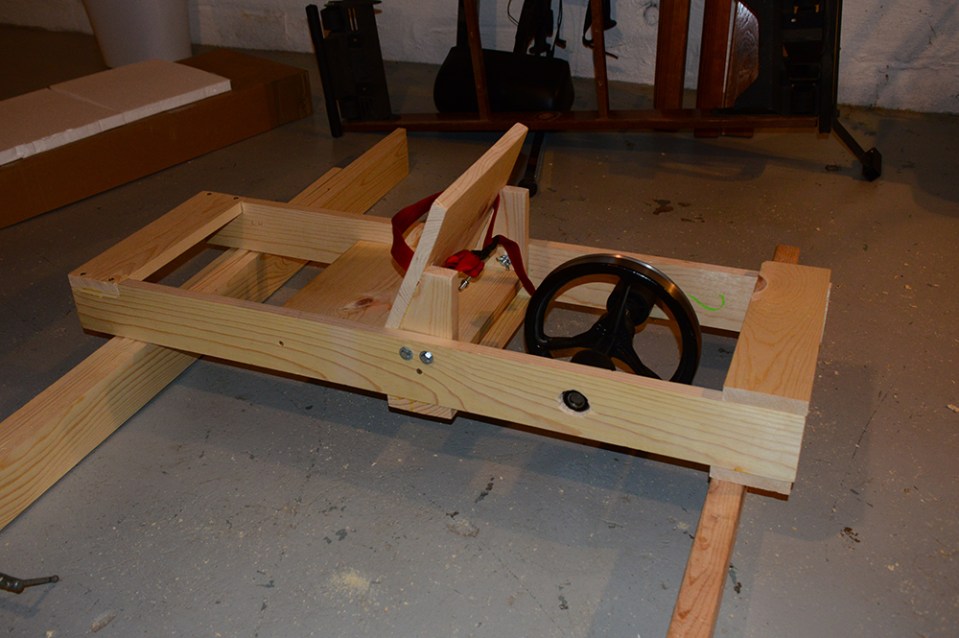
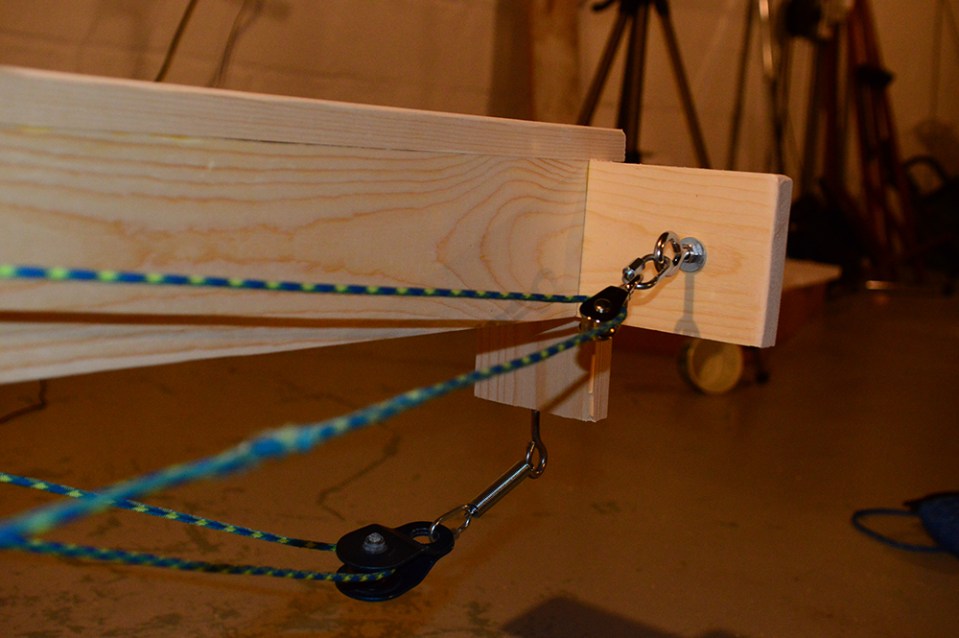
Pulleys in place, flywheel and tensioner band in, and “paddle line” strung.
Because I’m making this to somewhat mimic my surfski (a Fenn Elite), the seat can’t be overly stable.
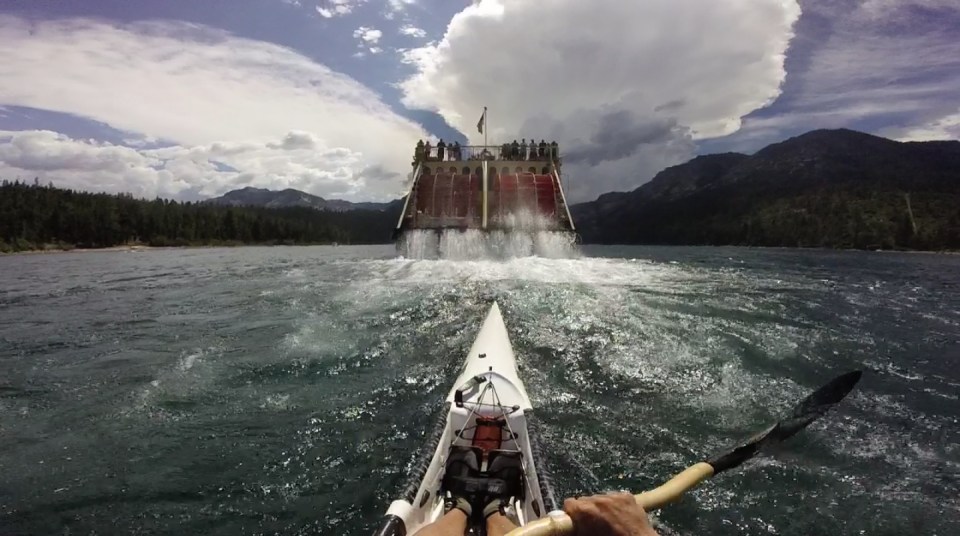
Okay, so that is OBVIOUSLY not Minnesota but it gives a good idea of what I’m trying to replicate.
I originally thought about making an articulated seat/ footplate bit that would rock like a kayak, but then realized I was lazy and didn’t want to go that far just yet. Ended up building a cradle for the BOSU (one of those half-balls that are super useful for conditioning/ physical therapy on your knees) so I could sit on that and have a bit of instability in the seat area.
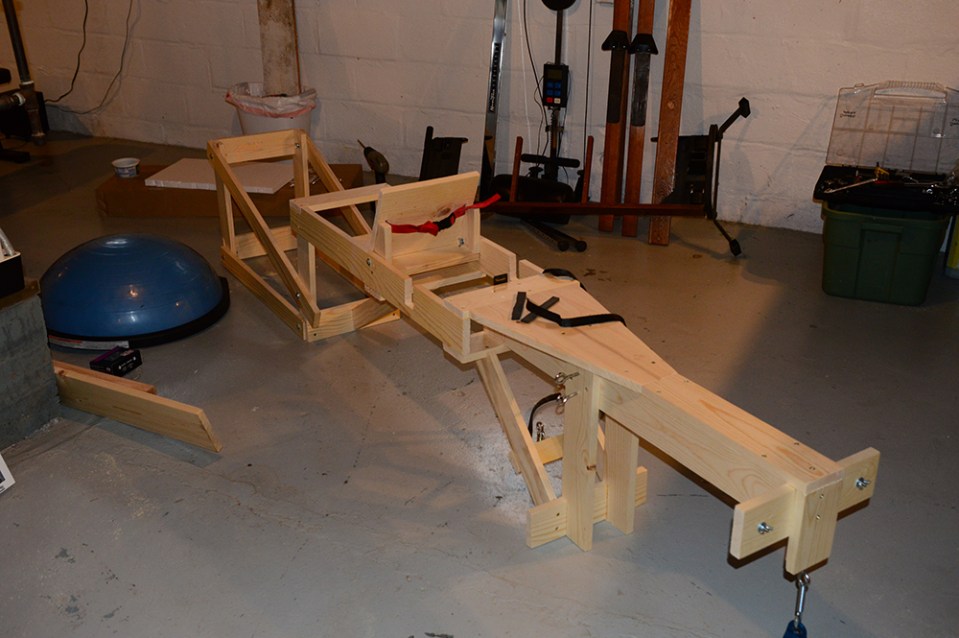
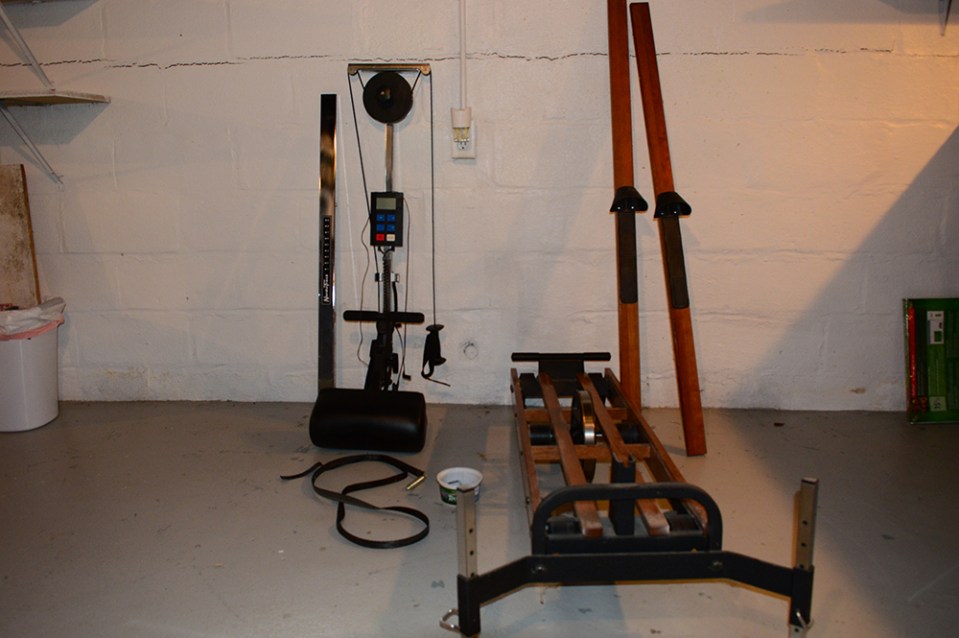
Cradle and BOSU off to the side. I also decided that I wanted to make the flywheel assembly removable in case I needed to fix or adjust anything, so the holes for the bearings got turned into notches I lined with neoprene for vibration reduction (i.e. me kicking or dropping the thing).

Also on this is the sensor from the NordicTrack computer- not sure how well it translates distance and speed from XC skiing to paddling, but why not?
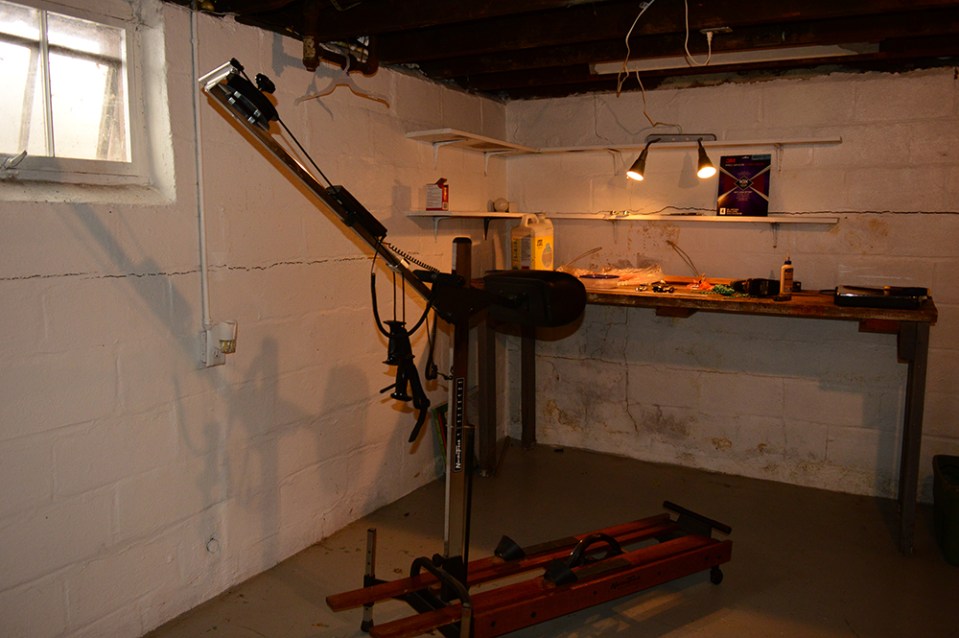
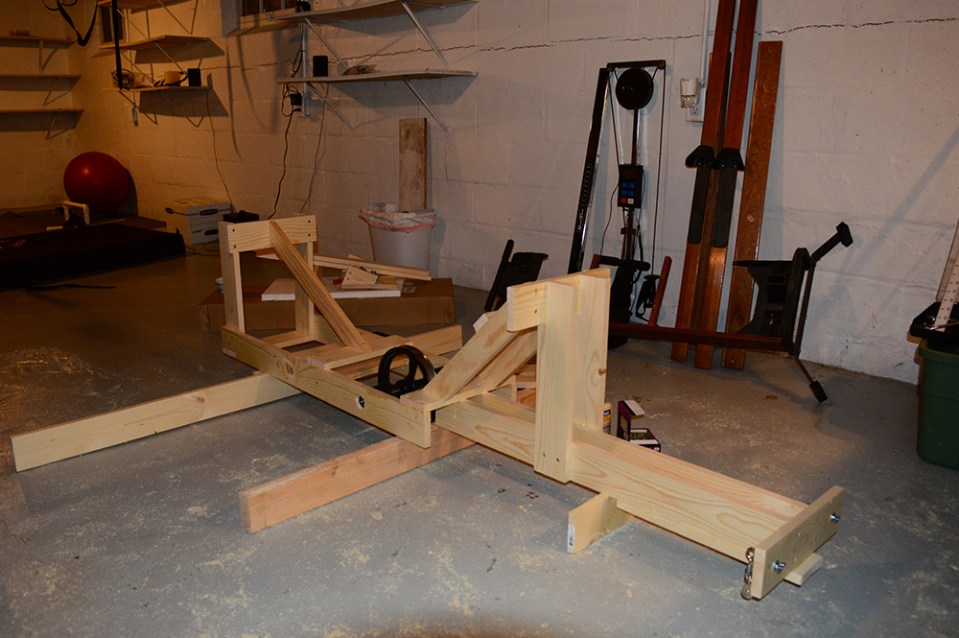
And the entire setup (version 1):
I put some duct tape around the edges of the paddle shaft- tied the line around the shaft and used a hose clamp to keep it in place:
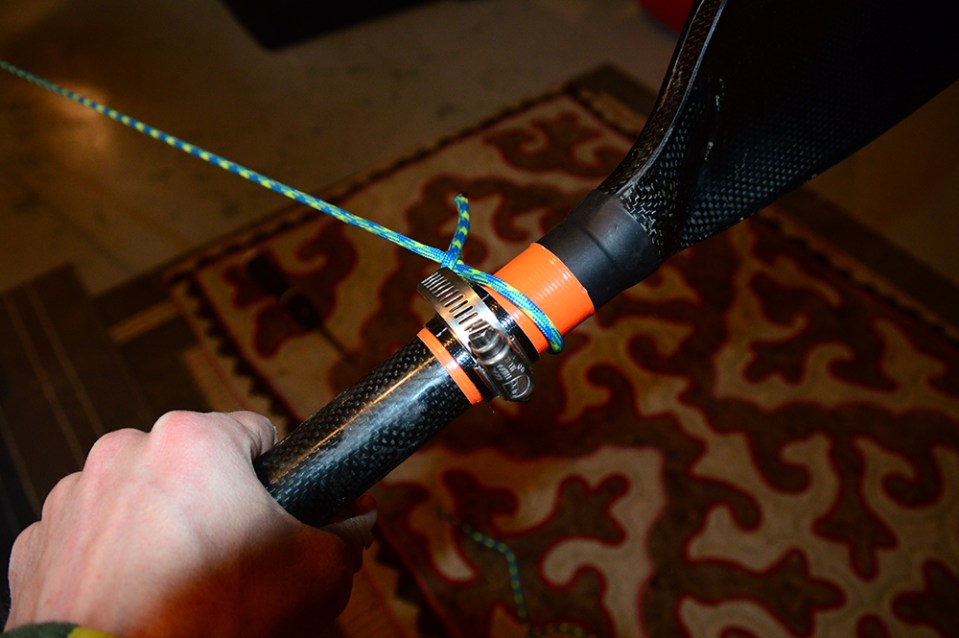
Kept the knot a little loose, wanted the paddle to be able to rotate through the knot to mimic using a feathered blade.
Version 1 FAIL:
Well, turns out that my original design had a couple problems. Mainly the font pulley system that started to catch the line and produce a little too much friction… which began to fray the cord.
Whoops. Managed to test the first version for about 2 minutes before I realized it needed a major overhaul. Things that got re-done:
- Flywheel assembly got moved to the very front. Unfortunately this involved taking apart the flywheel and bearings, which is what I was trying to avoid with the first design.
- Line/ pulley system re-worked and simplified a bit
Nothing that required major re-building, thankfully.

Cut space into the front bar to accommodate the bearings on the flywheel.
Took a bit of fine-tuning and meticulous woodwork to get the assembly mounted, but I managed to build inserts such that I can still remove the flywheel if necessary.
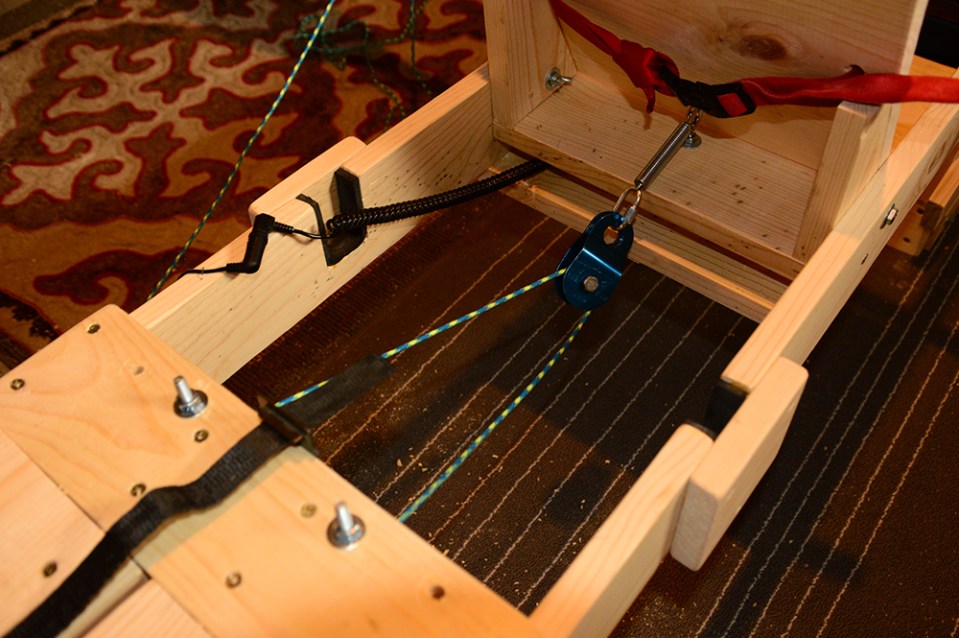
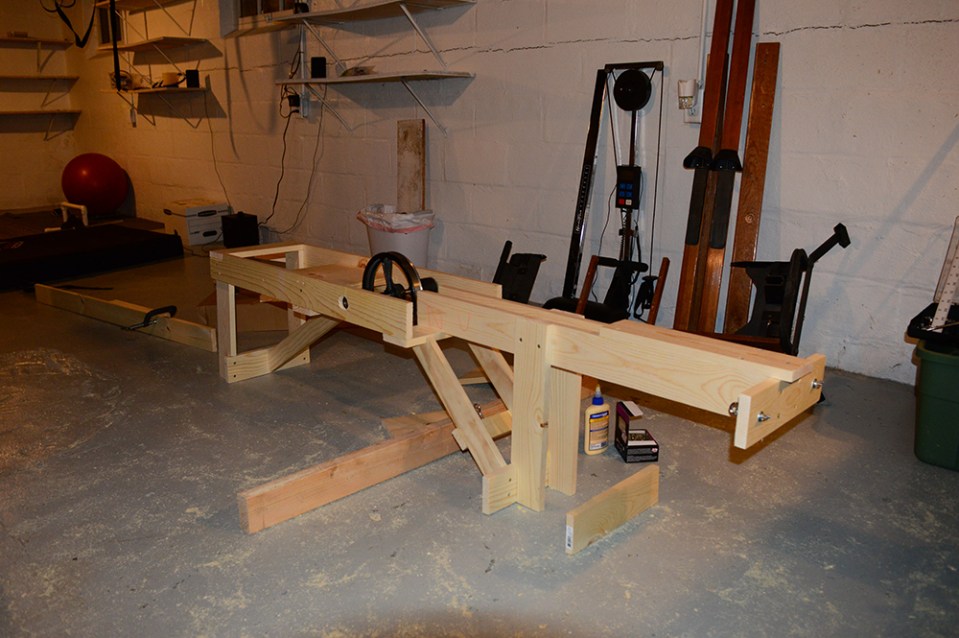
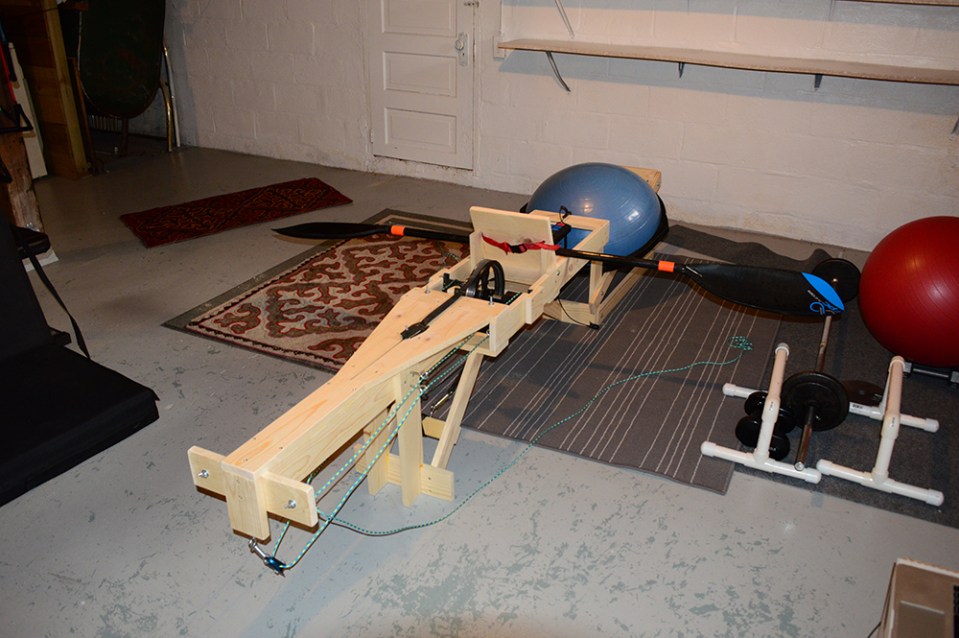
The pulley system was simplified to ONE pulley on a spring just in front of the footplate. A healthy helping of WD-40 and the pulley stopped squealing too.
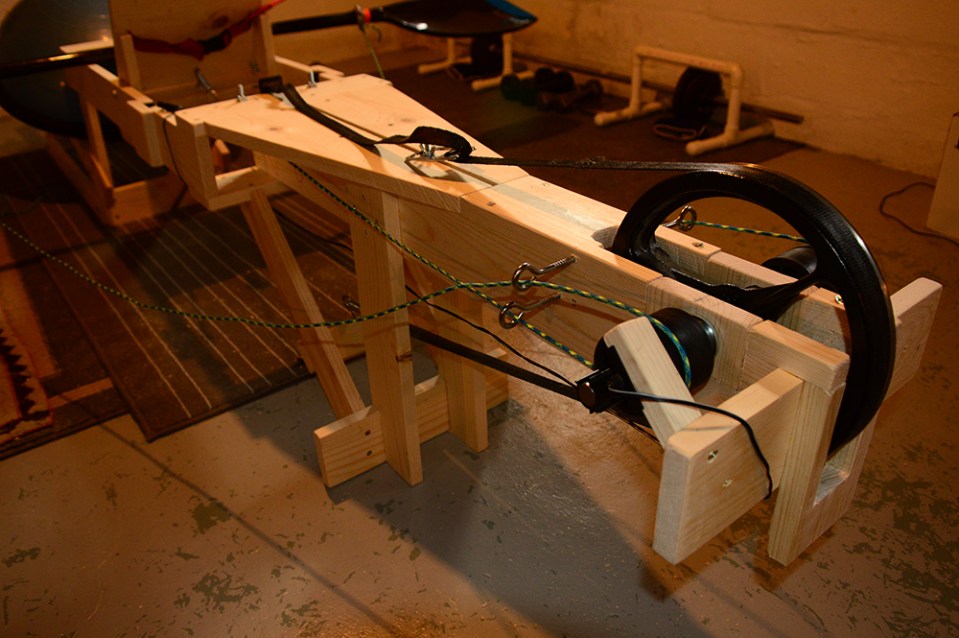
The revised setup. One pulley, eyebolts to guide the line, and re-routed the computer’s sensor.
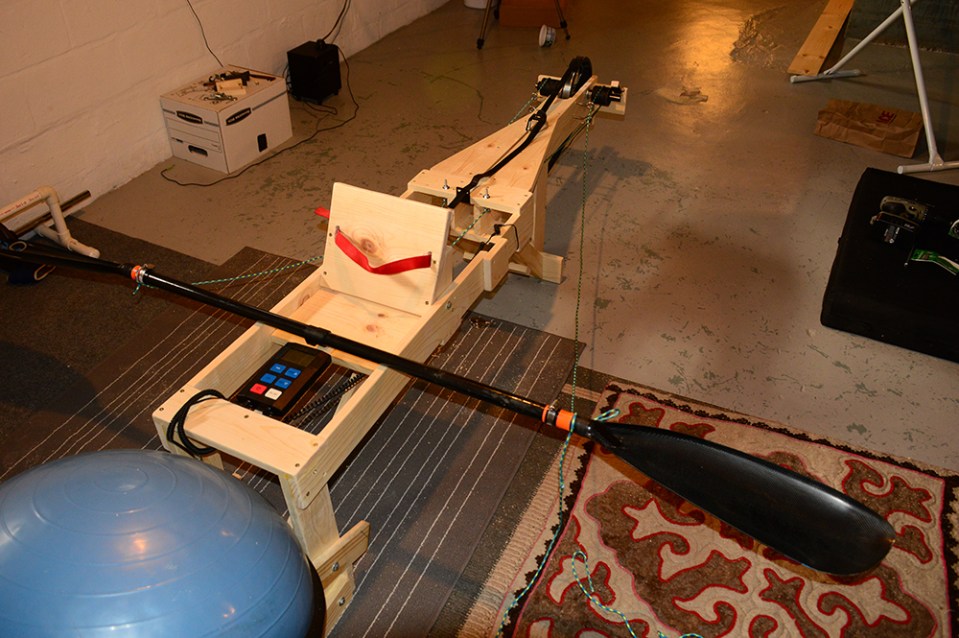
Kayak ergometer v2. Good thing is, after a quick test- all problems were fixed! Still a couple little kinks I need to work out involving the flywheel and tensioner assembly, but for the most part I now have a working kayak erg!
I’m sure at some point in the future I’ll build another one, but the mechanics and setup of this one seem to work just fine for now.
Click HERE to see a quick video of the kayak erg v2 in action…
All in:
- One used NordicTrack
- ~$100 in lumber and hardware from Home Depot and a couple trips to Ace
- 1 day building v1, and another day (ish) re-designing and re-building parts for v2
Now I can set up the basement to watch kayaking videos while I’m on the kayak erg. Next step is attaching a generator 🙂
